Tag: Tutorial

  • How to do an easy Random Drawing using Excel

    How to do an easy Random Drawing using Excel

    Random-Drawing-Cover-Beartoons

    As I wrapped up the Christopher Hart Cartoon Faces Book Giveaway, I thought I share with my readers a tutorial on “How to do an easy Random Drawing using Excel.”  If ever you don’t want to print out entry chits and draw by hand, these five easy steps will make things less time consuming for you.

    STEP 1:

    Random-Drawing-Step-1-Beartoons

    • In Column A, type in or import all the names of the people who are part of the drawing.
    • In cell B1 type in the formula =RAND()   This will generate a random number in B1 between 0 and 1.
    • Copy the formula in B1 and paste it down the rest of the column so each name has a random number next to it.

    STEP 2:

    Random-Drawing-Step-2-Beartoons

    • In excel, hit CTRL-A (PC) or Highlight all the cells with data in it in Columns A and B.
    • Click on the DATA tab and then the SORT button.  This will pull up a new dialogue box.
    • Choose Sort by Column B and it doesn’t matter if you choose smallest to largest or largest to smallest.  Select OK.
    • What this does is the same thing as having physical entries that you mix up by hand.  You have randomly assigned each person a number and that number sorted mixes up all the entries.

    STEP 3:

    Random-Drawing-Step-3-Beartoons

    • Go to www.random.org/integers/
    • Since I want to have only one winner I put “1” where it says “Generate X random integers”
    • Value set is 1 to 37 because I have a total of 37 rows.  If I had a header in row one such as “NAME” and “RANDOM NUMBER” this would have pushed my data from rows 1-37 to rows 2-38.  So be sure to only include the rows of the data and not the headers.
    • Select Get Numbers.

    STEP 4:

    Random-Drawing-Step-4-Beartoons

    • Your number has been generated and the results show up here.  In my case the result was number 25.

    STEP 5:

    Random-Drawing-Step-5-Beartoons

    • Return to excel and scroll down to the 25th row.
    • That is your winner.

    Hope this helps as you do drawings on your own.  Please let me know if you have any questions.


  • Change Photoshop Line Color in Two Easy Steps Tutorial

    Change Photoshop Line Color in Two Easy Steps Tutorial

    Paul Stanley KISS Change Line Color in 2 Steps Photoshop Bearman CartoonsI have had requests to share my quick way to change line (or ink) colors in Photoshop Elements or Photoshop (I am not sure if GIMP has the same controls but it might).  Now I know there is no reason you would want to make Paul Stanley of KISS fame into the blue colored thing on the right above but I needed a good image with a lot of dark areas to really show you the impact of what you can do so Paul came to mind.

    I am someone that likes to sketch with a black color but when it is time to ink, I don’t want the same color so I use this process to change my sketch color layer to something lighter so it is easier for me to ink in black.   Here is the process:

    STEP ONE: Choose the layer that you want to change the color and in the Layers Palette (typically to the right of the screen) click on the square checkerboard image next to the word “Lock”.   Don’t click on the actual lock image as that will actually lock your layer completely allowing now changes to be made.   By clicking on the checkerboard pattern you are locking the transparent areas of your layer allowing you to easily change the nontransparent portion to whatever color you want.

    How to Lock a Layer in Photoshop Bearman Cartoons


    STEP TWO:  Choose the foreground color that you want to change the image to (in my example I chose blue)  and go to EDIT>FILL SELECTION and hit OK.   That’s it.   If you only want to change a portion of the layer, you can use your brush tool and paint over any area you wish.  That is what I did in my love bug image from a month ago.

    Love Bug by Bearman CartoonsEverything started as black ink lines and then I used the process described above to change the outline of the bug to a darker green and the heart to a darker red while still keeping the smile and the eyeballs the original black.

    Let me know if anything isn’t clear.  Have fun.


  • Create a Custom Jack-O-Lantern Pattern in Photoshop Express


    It has been a while since I have done a tutorial so in time for the season, here is the How-to create a custom Jack-o-Lantern pattern in Photoshop or Photoshop Express.  What could be scarier on your front porch than George Ford (of Addanac City fame) greeting all the kids in the neighborhood.  I swear I would pick on someone else sometime but the rest of you don’t post enough pictures on the web.

    Step 1

    – Open a new document (I made mine about 8inx8in), paste your picture in the document and resize it so there is some white background showing.

    – Using the brush tool, make a white border around the entire picture.  I used a 10pt brush.

    Step 2

    – Color the background layer black.

    Step 3

    – Select Image>Mode>Grayscale

    – You want to make sure the color is balanced.  My original pic was too bright so you can adjust by going to Enhance>Adjust Lighting>Brightness/Contrast in Photoshop Express or Image>Adjustments>Brightness/Contrast in full Photoshop.

    Step 4

    – Select Filter>Adjustments>Posterize (Express) or Image>Adjustments>Posterize (Full).  Choose 3 levels and select and it will give you a Black, White and Gray Image.  If the outline that you did in Step 1 is full white, change it to 50% gray.  You should get above.   You will notice that it has bits of color all over the picture that you don’t want to have to carve so,

    – Using your pen too set to black, white or gray color in the image to remove some of the dithering and random color spots.

    Step 5

    As you can see in the above pic I cleaned up the image to make it into cutable chunks.   In the end you are going to want to shave off the skin of the gray area, cut the white area completely through, and leave the black area alone.  Look at your white area.  If there is danger of you cutting away detail of the gray you need to adjust your picture more.  As you can see in the final template in the first image of this post, I added more gray area around the nose so I wouldn’t cut my nose to spite my face..haha

    George was too scary to carve so instead I did Bearman.

    Here is what it looks like unlit.  It was my first time trying to use a dremel so I need to clean it up.

    As you can see, in this one I only posterized to 2 colors (black and white).  For the white, I pulled off the skin and the black I left alone.  I then put two full holes in the eyes.

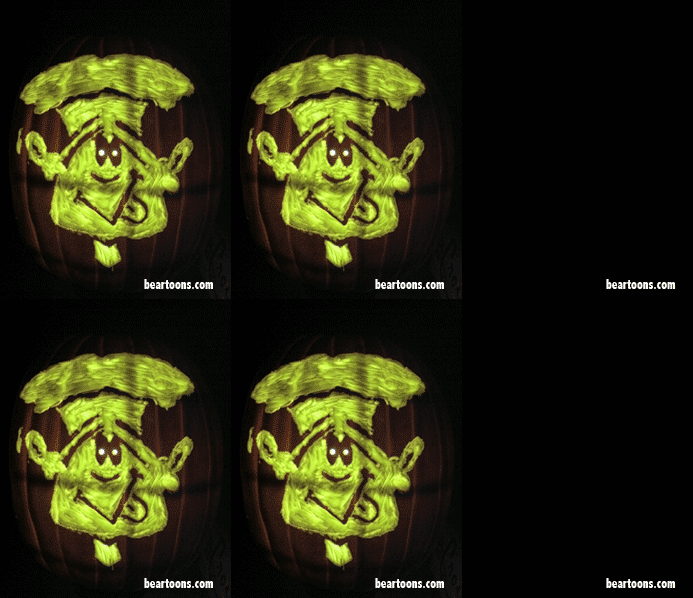
    Here is the the final look when lit.

    And in case you want to make your own Bearman Pumpkin…here is the template.

  • Put your Picture in a Scarface Poster (and 34 other Photoshop tutorials)

    Your Image on a Scarface Poster

    Ever wanted to replace Tony Montana (Al Pacino) with your own picture on a Scarface Movie Poster?  What about learning how to create a Star Wars or Indiana Jones text in Photoshop?  Or if you are a Avatar fan, how about a tutorial to turn your picture into a Na’vi??

    Links to all can be found at 35 Awesome and Inspiring “Movie Effect” Photoshop Tutorials.  Check it out.

  • Tutorial: Create Curtain Texture in Photoshop

    Because I am the Photoshop wonder kid, George Ford asked in the comments of my Obama & Carter cartoon how I made the background curtain. Whether you are using Photoshop or simply Photoshop Elements like I do, it is a simple 4 step process. There are more in depth tutorials out there but this works for me and most people who just want to allude to the fact that there is a curtain backdrop.

    STEP 1.
    Create a new layer and fill it with Black. It should look like this…(duh)
    Curtain1

    STEP 2:
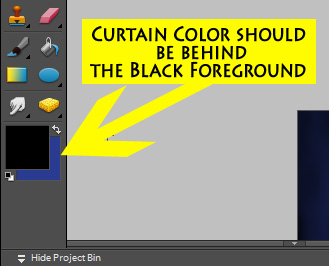
    Leave Black as your foreground color and choose a background color that you want your curtain to be. I chose blue. Make sure Black is in Front of the color you chose.

    color

    STEP 3:
    Click on FILTER > RENDER > FIBERS. You can play with the settings but I used a Variance of 6 and Strength of 4.

    Curtain2

    STEP 4:
    Finally click on FILTER > BLUR > GAUSSIAN BLUR. I set a radius to 5 and tada, you get a curtain.

    Photoshop Curtain Tutorial at beartoons.com

    I look forward to Hank Addanac taking to the stage in the near future.

    Follow me via TWITTER updates. or you can share this cartoon by clicking one of the below.

    Tweet This  Blog Post!Add to Digg

  • Tom Richmond Caricature Tutorials

    One of my new favorite places on the web is visiting Tom Richmond’s blog. Tom is a freelance illustrator who does a lot of work for Mad Magazine.

    I marvel that with his workload he consistently publishes pretty much daily, with tips, news info, and caricatures he has done.

    He even has a section where he has highlighted several of his caricature drawing tutorials. Of course even reading his stuff doesn’t make my crap look any better but it definitely helps you look at the drawn image differently. I especially like how he explains the “Law of Constant Mass“.

    Whether you enjoy cartooning or enjoy seeing a great cartoonist…check it out.